Assigning Metadata from Capture One
While the primary focus of Capturebot is getting metadata into Capture One, it can also do the opposite. There are a few steps to pull metadata from Capture One into the original RAW files.
Known Issues
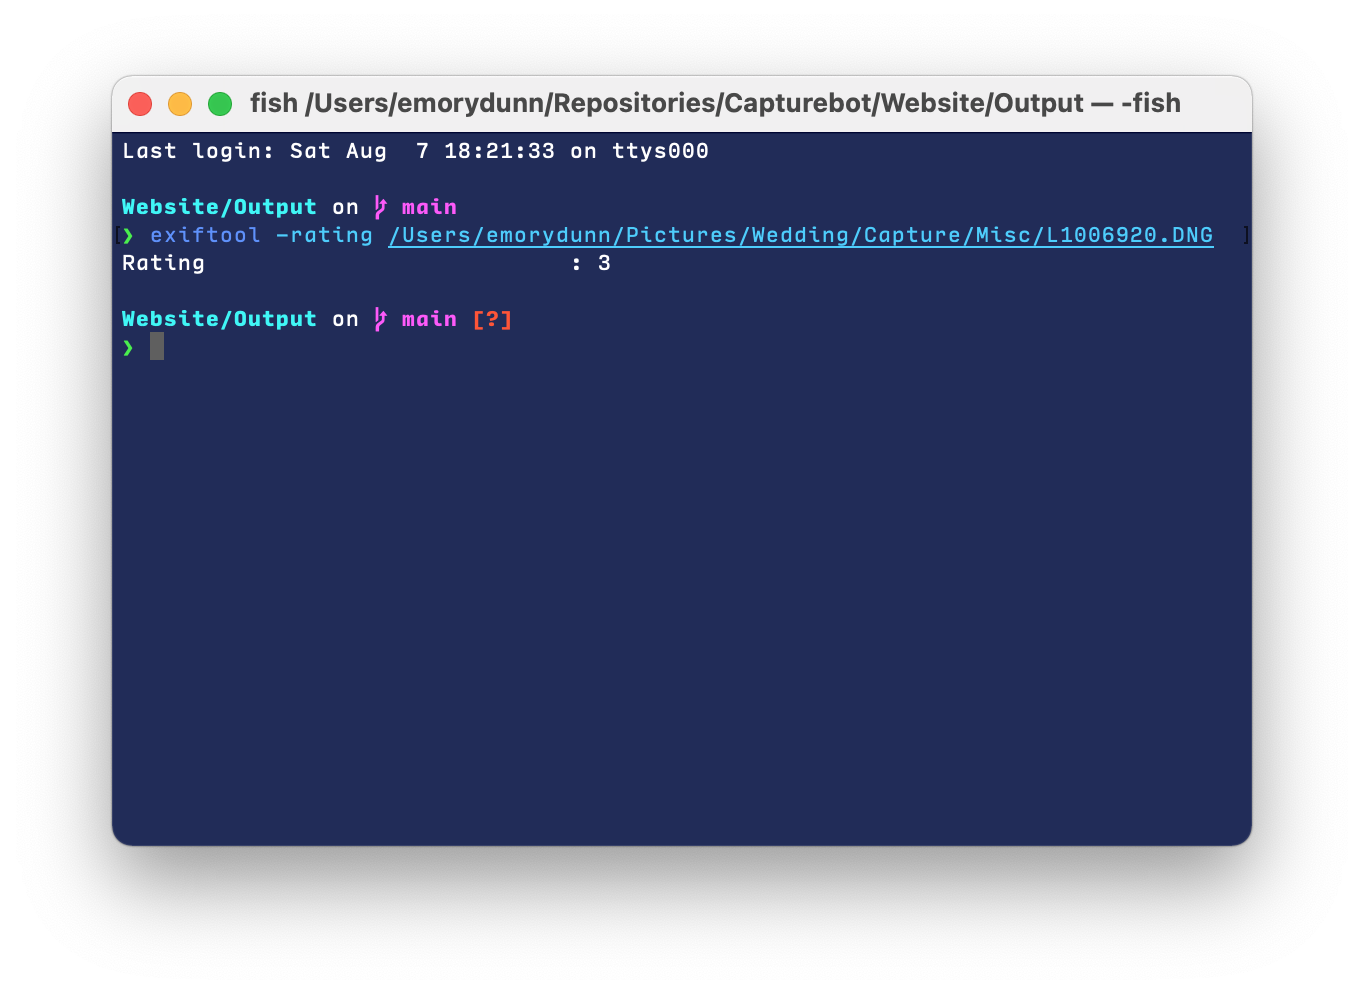
While writing this document I found a bug when importing the XMP sidecar files. In this case Capturebot isn't using its own copy of Exiftool, so you'll need to install it.
In order for this to work you need Exiftool installed at /usr/local/bin/exiftool.
Homebrew
If you use Homebrew, then you can install Exiftool by running brew install exiftool.
For older Homebrew installations Exiftool will be installed in the expected location. However, if you've installed Homebrew more recently you'll need to link Exiftool from the new location to the old: sudo ln -s /opt/homebrew/bin/exiftool /usr/local/bin/exiftool
Exiftool Installer
For most people using the Exiftool installer is the way to go. You can download it from their homepage. The package installs Exiftool into the expected location.
Creating XMP Sidecar Files
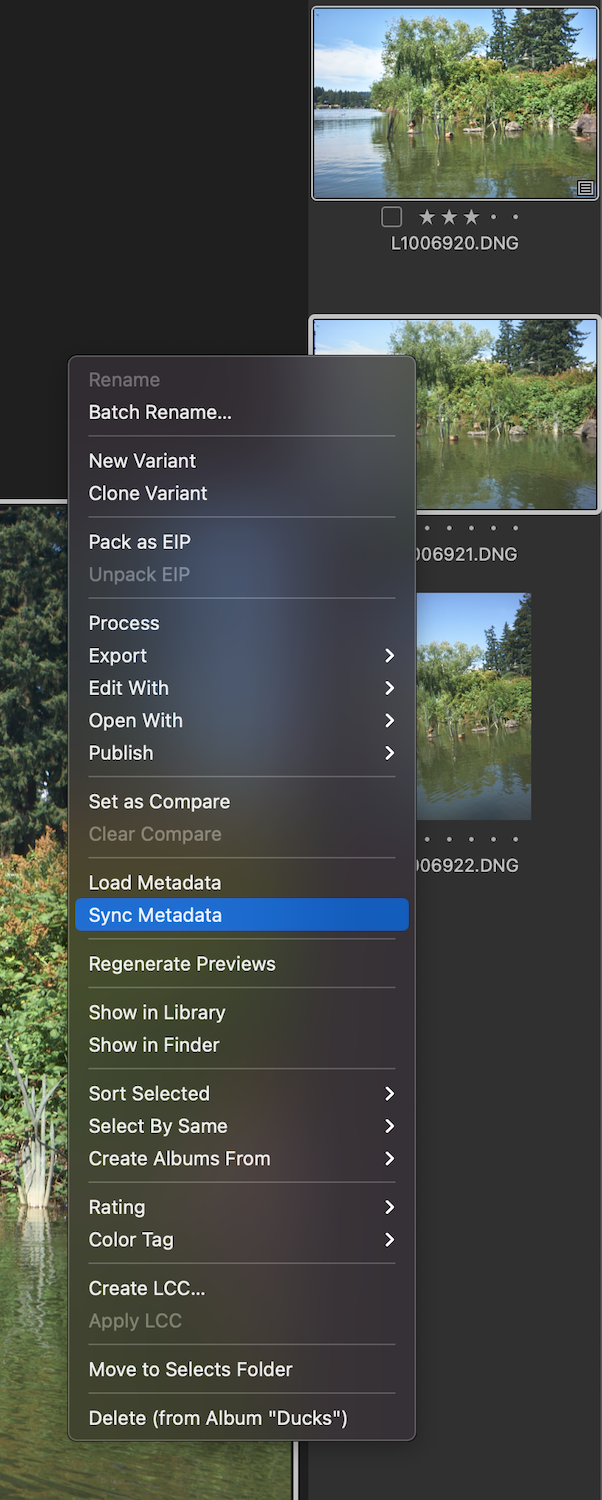
The first thing that needs to be done is to sync Capture One's metadata into XMP sidecar files. The easiest way to do this is to right click on the images in the browser and select "Sync Metadata".
Importing into Capturebot
From the View menu in Capturebot select Datasource > Image Datasource. Now you can drag your new XMP sidecar files into Capturebot's Datasource section.
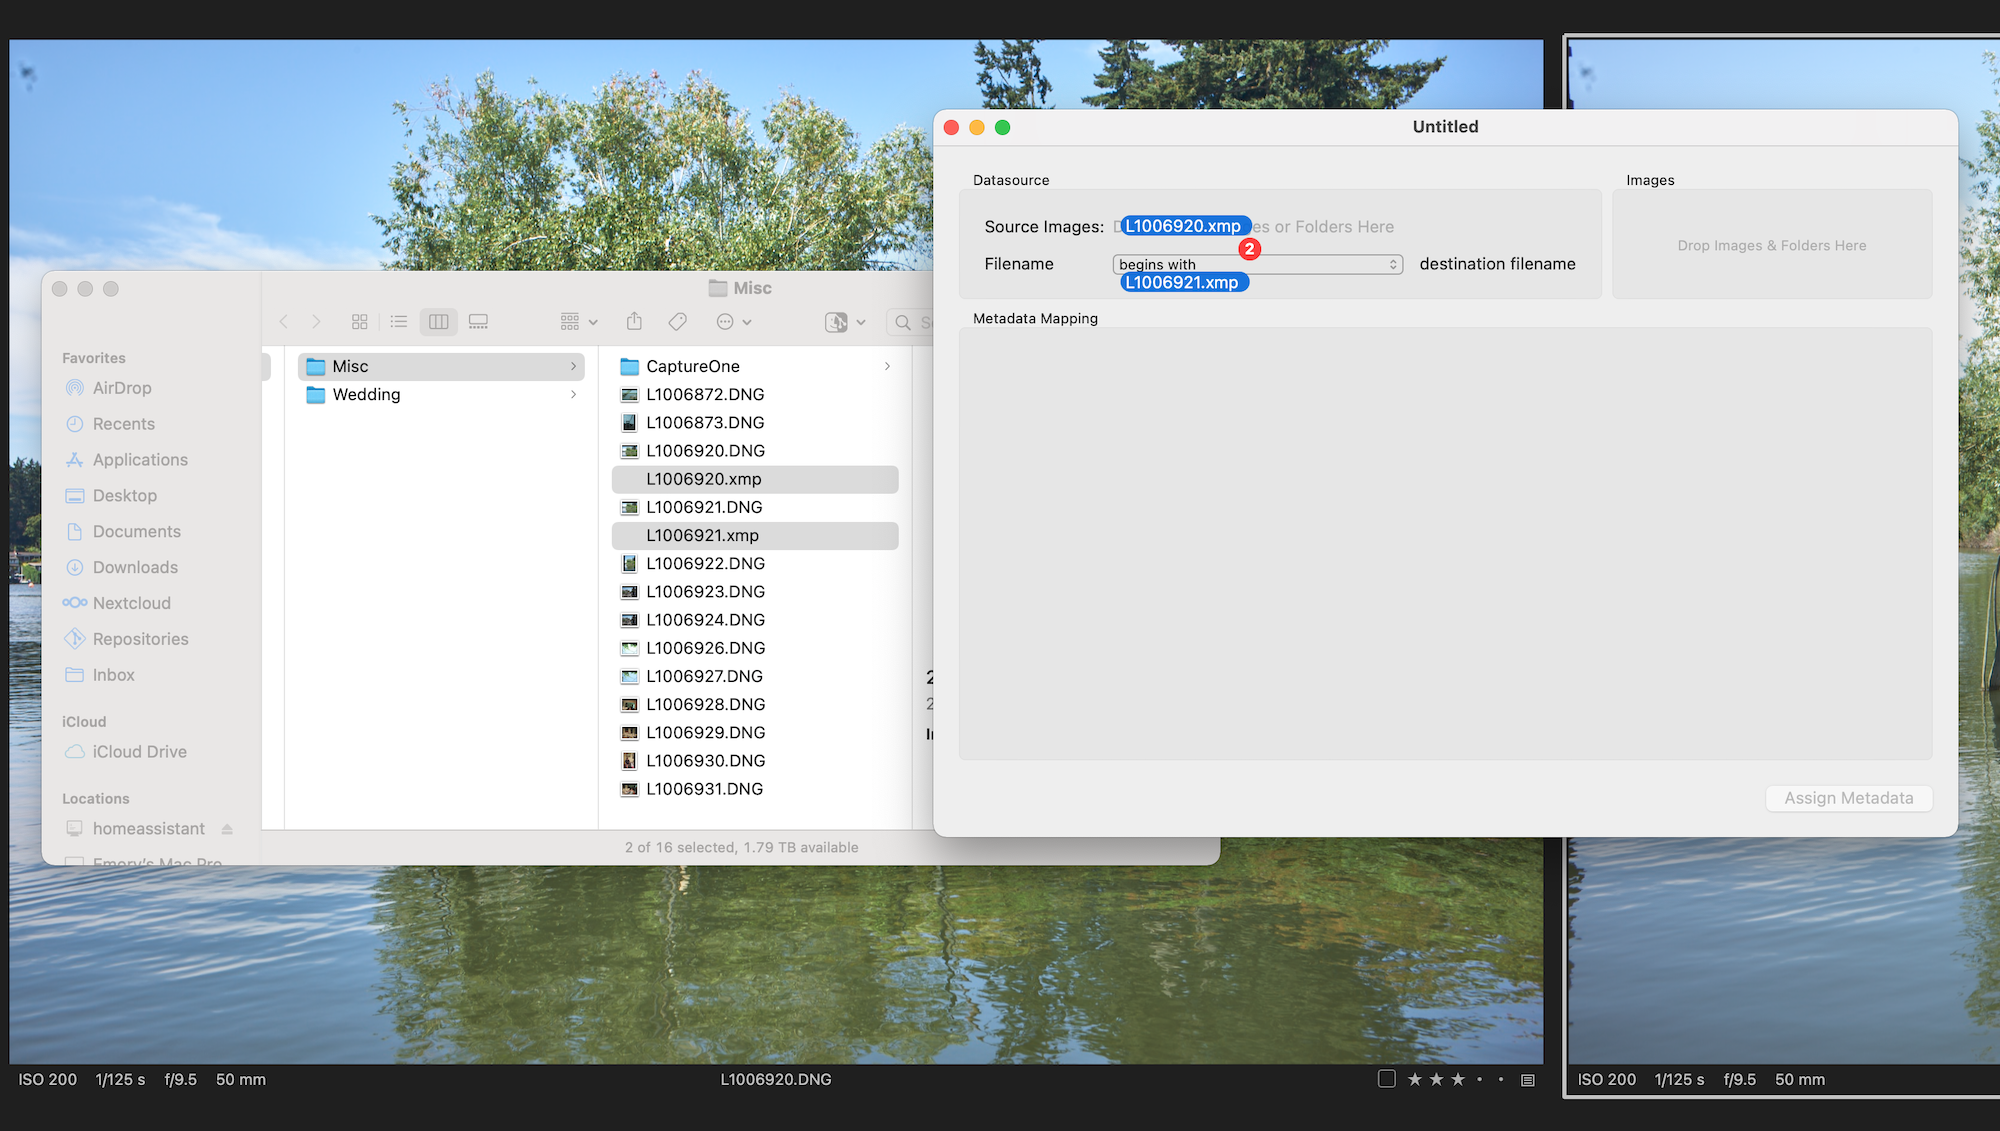
Next you can either drag your entire folder of images into Capturebot, or just the images with XMP sidecar files.
Mapping Metadata
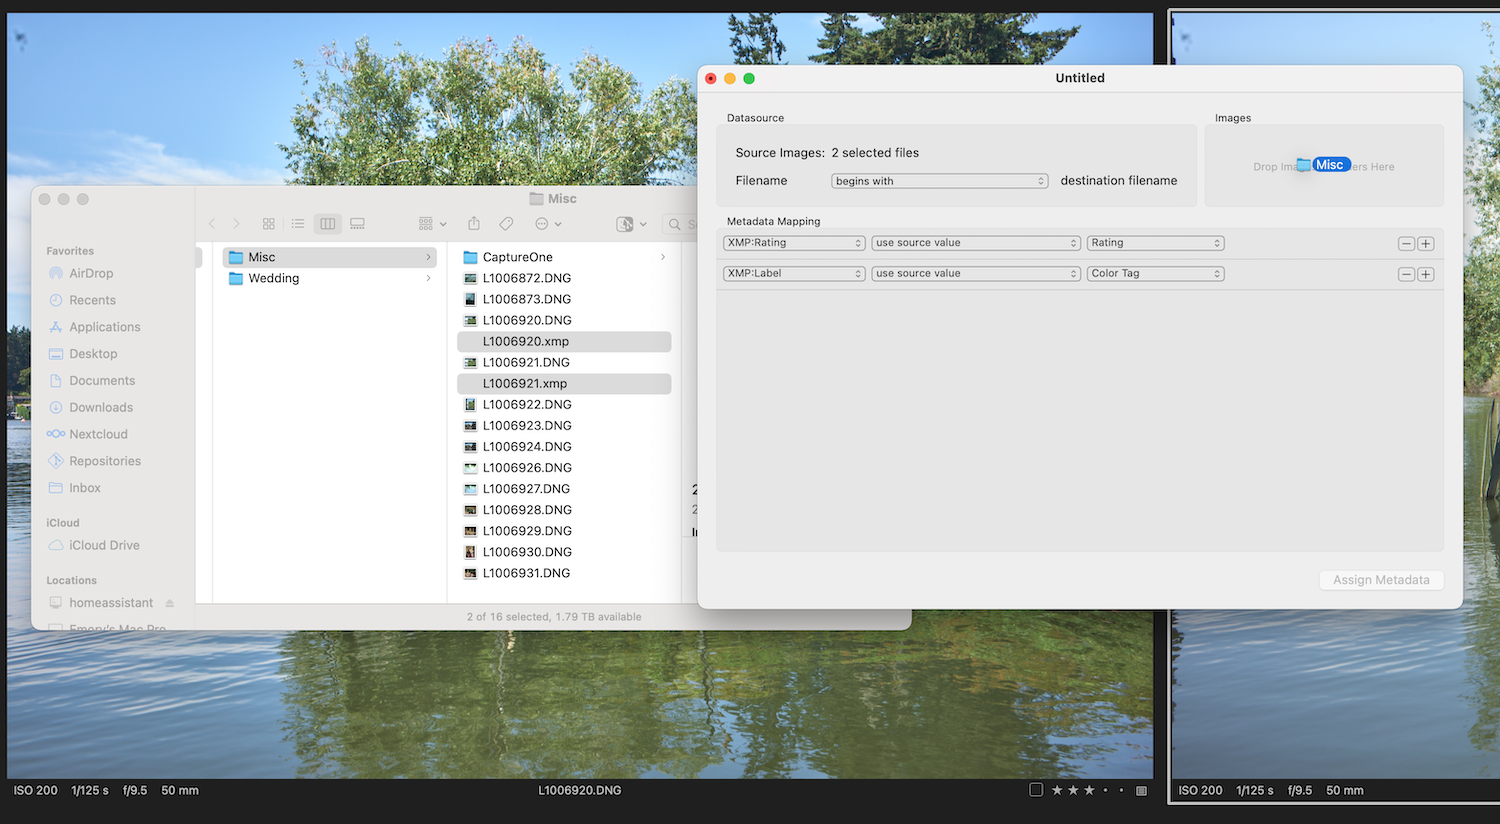
After you've added your XMP files you need to select what metadata to sync. Follow the Mapping Metadata guide for more info.
Assigning Metadata
Ensure Capturebot is set to embed metadata into files in preferences.
Now click the Assign Metadata, and depending on how many files you've selected wait a bit, and your RAW files should now have your selected metadata embedded in them.